Vinyl floors have been incorporated into most houses and business places. It is affordable, robust, and stylish. Yet to maintain its appearance, regular polishing and stripping are essentials. Polishing and stripping contribute to a better appearance and longer lifetime of the floors. In this blog post, we are going to discuss good techniques of vinyl floor polishing and stripping. We want to make things easy to understand, and therefore, achieve great results with easy, clear, and actionable steps.
Preparing for Vinyl Floor Polishing
Polish preparation Before polishing, you need to prepare. Now get all the necessary tools and materials to do the best job. Here is a list of the things that you will find useful:
Get the necessary equipment and supplies
- Polisher: Supplies an equal amount of polish A machine avoids the acquiring of unprofessional touches and saves much time as compared to the other handmade methods.
- Floor polish: Always choose a product meant for vinyl floors. Never fail to check on the type of vinyl you have as it might cause some damage to the floor.
- Cleaning supplies. For instance, the broom, vacuum cleaner and mop will each be used in preparing the desired floor. A microfiber mop will pick up dirt without scratching a surface.
Safety Precautions
Before starting, it’s essential to take some safety precautions. These will ensure that you work safely and effectively. Here are some important tips:
- Wear protective gear: Use gloves and goggles to protect your skin and eyes. This is especially important when handling chemical products, as they can cause irritation.
- Ensure proper ventilation: Open windows or use fans to keep the area well-ventilated. Good airflow helps disperse any fumes from cleaning products, making the environment safer.
By following these preparation steps, you can create a safe and efficient workspace for your vinyl floor polishing project. Additionally, taking the time to prepare will lead to better outcomes.
Step-by-Step Guide to Vinyl Floor Polishing
Polishing your vinyl floors is a straightforward process, but it requires careful attention to detail. By following these steps, you can achieve a beautifully polished surface that enhances your space.
1. Clean the Floor
Before you polish, cleaning the floor is crucial. Here’s how to do it effectively:
- Sweep or vacuum: Start by removing loose dirt and debris. This prevents scratches during the polishing process.
- Mop with a suitable cleaner: Use a cleaner that is safe for vinyl. Additionally, ensure that you follow the manufacturer’s instructions for dilution and application.
- Spot clean any stains: If you notice stubborn stains, treat them with a gentle cleaner before mopping. This extra step can significantly improve the final appearance.
2. Dry the Floor
After cleaning, drying the floor is essential. Here’s what to do:
- Allow the floor to air dry: Open windows for ventilation. This will help speed up the drying process and ensure a clean surface for polishing.
- Check for damp spots: Use your hand to feel for moisture. Any damp areas can affect the polish’s adherence and finish. However, you can hire floor polishing services in Singapore to get expected results.
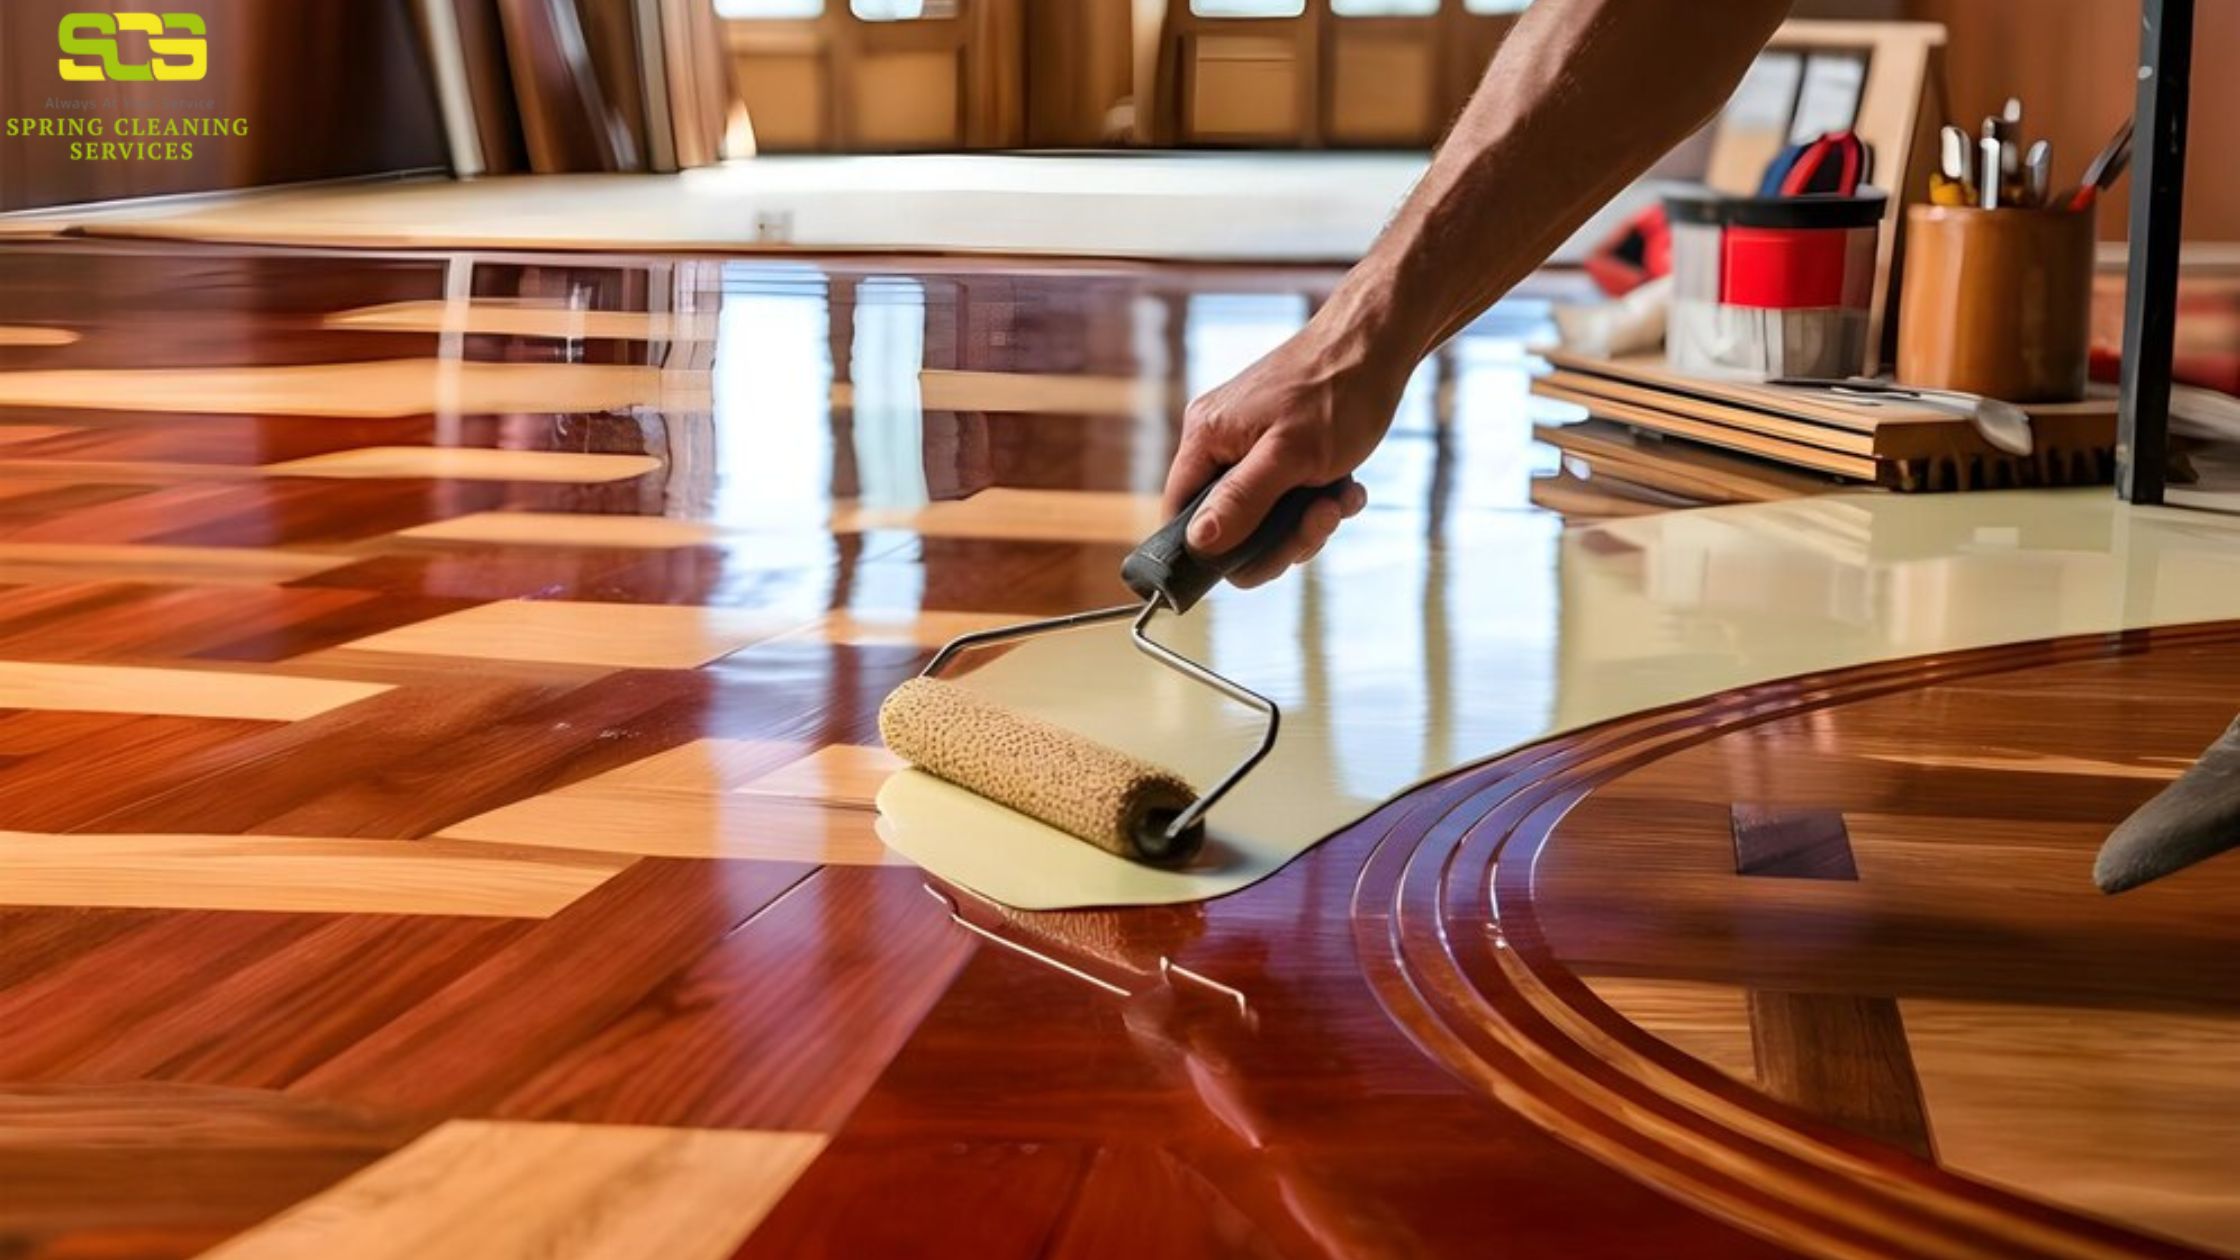
3. Apply the Polish
Now that the floor is clean and dry, it’s time to apply the polish. Follow these steps:
- Use a polishing machine: This is the most effective way to apply polish evenly. Additionally, machines designed for vinyl floors will ensure you do not damage the surface.
- Follow the manufacturer’s instructions: Each polish may have different application methods. For example, some require a specific amount of polish per square foot.
- Work in small sections: This approach allows you to focus and ensure even coverage. Moreover, it prevents the polish from drying before you can buff it.
4. Buff the Floor
Buffing enhances the shine and finish of your polished vinyl floor. Here’s how to do it:
- Buff with a clean pad: Once the polish is applied, use a clean buffing pad. This step helps to spread the polish evenly and increases the shine.
- Allow the polish to cure: Follow the recommended curing time on the product label. Proper curing is essential for durability.
- Inspect the finish: After buffing, check for any missed spots. If you find uneven areas, reapply polish and buff again.
Why Strip Vinyl Floors?
Stripping vinyl floors is another essential maintenance step. This process removes old polish or wax, preparing the surface for new application. Here are some reasons to strip your vinyl floors:
- Removes buildup: Over time, layers of polish can accumulate, dulling the surface. Stripping helps restore the original look.
- Prepares for new polish: A clean surface allows for better adhesion of new polish, resulting in a longer-lasting shine.
When to Strip
Knowing when to strip your vinyl floors is critical. Here are some signs that indicate it’s time:
- Dull appearance: If your floors look lackluster despite regular polishing, it may be time to strip away old layers.
- Visible damage: Scratches or scuffs that polishing cannot fix often signal the need for stripping. Addressing these issues promptly can prevent further damage.
Preparing for Vinyl Floor Stripping
Before you begin stripping, preparation is just as important as with polishing. Here’s what you need:
Gather Tools and Materials
- Stripping solution: Choose a product designed specifically for vinyl. Always read the label to ensure it’s suitable for your flooring type.
- Scrubbing pads or machine: Depending on your preference, you can use either manual scrubbing pads or a floor machine. Both will help effectively remove old polish.
- Cleaning supplies: Have brooms, vacuums, and mops ready to clean up before and after stripping. Additionally, make sure to have clean rags on hand for any spills.
Safety Precautions
Just like Vinyl floor polishing, safety is crucial when stripping floors. Here are some important safety tips:
- Wear protective gear: Use gloves and goggles to safeguard your skin and eyes from chemicals. This is especially important if you have sensitive skin.
- Ensure proper ventilation: As with polishing, open windows or use fans. Good airflow is essential when working with chemical products to avoid inhaling harmful fumes.
By following these preparation steps, you can create a safe environment for your vinyl floor stripping project. This ensures not only your safety but also the best possible results.
Step-by-Step Guide to Vinyl Floor Stripping
Stripping vinyl floors is a systematic process. Here’s a clear guide to help you through it.
1. Clear the Area
Before you begin, make sure to prepare the space effectively:
- Remove furniture and rugs: Clear the area completely to avoid damaging items and ensure an unobstructed work environment.
- Check for loose tiles: Inspect the floor for any loose tiles and fix them beforehand. This will prevent further issues during the stripping process.
2. Apply Stripping Solution
Now, it’s time to apply the stripping solution. Here’s how:
- Follow the instructions on the product: Each stripping solution may have different application methods. Make sure to read the label carefully for proper usage.
- Apply evenly: Use a mop or applicator to spread the solution over the floor. Ensuring even coverage will make the stripping process more effective.
3. Scrub the Floor
Once the solution is applied, scrubbing is essential:
- Use a scrubbing pad or machine: This helps to agitate the old polish and break it down. If using a machine, be sure to set it to the appropriate speed for vinyl.
- Work in small sections: This approach allows for better control and ensures thorough cleaning. Additionally, it prevents the solution from drying before you can scrub.
4. Rinse Thoroughly
After scrubbing, rinsing is crucial:
- Remove all stripping solution: Use a clean mop and water to ensure no residue remains. This is important for the longevity of your new polish.
- Dry the floor: Allow the floor to air dry completely. This step is vital for preventing water damage or mold growth.
5. Dry the Floor
Finally, ensure the floor is completely dry before applying any new polish. This will enhance the effectiveness of your maintenance efforts.
The End Note
Thus, it is very essential to preserve and keep your vinyl floors in great condition through efficient polishing and stripping techniques. Therefore, you can approach floor polishing services in Singapore to restore the glory of your vinyl floors. The benefit of knowing these processes and following these steps in this blog will surely help you preserve the best quality for your flooring. Regular maintenance does more than enhance the appearance of your flooring over time; it also protects your investment. So, pay proper attention to your vinyl floors and they will serve you for years to come.