
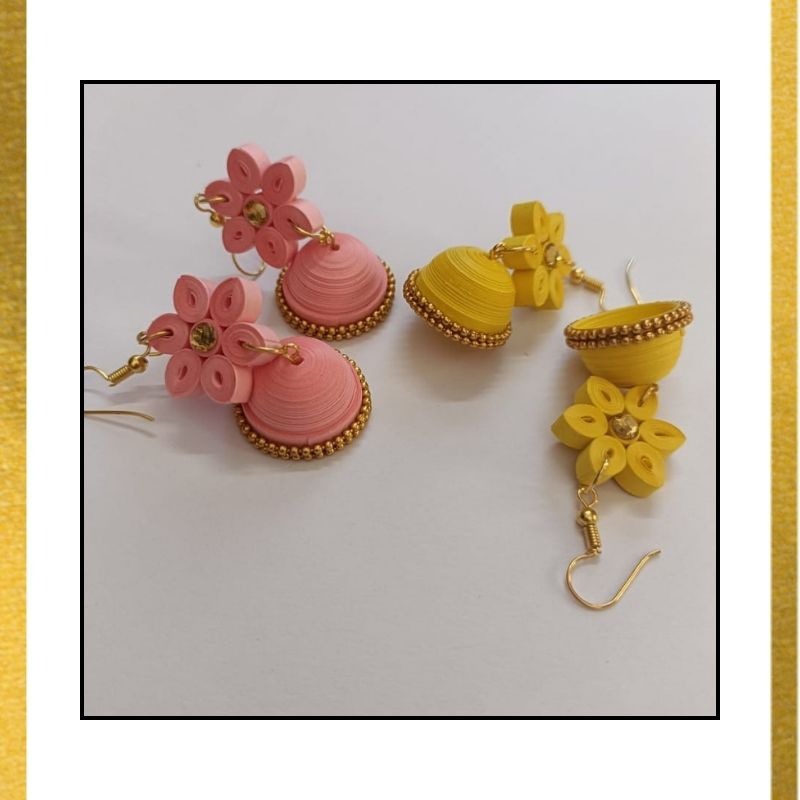
Quilling paper earrings are exquisite pieces of jewelry crafted using the art of quilling, also known as paper filigree. Quilling involves rolling thin strips of paper and shaping them into various designs. These earrings typically feature delicate coils, scrolls, and shapes made from paper strips, often arranged in intricate patterns.
To create quilling paper earrings, artists start by selecting colorful paper strips and rolling them tightly using a quilling tool. The rolled paper coils are then shaped into desired forms such as teardrops, circles, or intricate floral motifs. These shapes are arranged and glued together to form the final design.
The earrings can be adorned with additional embellishments like beads, crystals, or metallic accents to add sparkle and flair. Despite being made from paper, quilling paper earrings are surprisingly durable due to a sealant or varnish applied to protect the paper from moisture and wear.
These earrings are not only lightweight and comfortable to wear but also offer a unique and artistic touch to any outfit. They come in a variety of designs, from simple and elegant to bold and elaborate, making them versatile accessories for any occasion
Materials Needed:
- Quilling paper strips (you can buy pre-cut strips or cut them yourself from colored paper)
- Quilling tool (a slotted tool or needle tool)
- Glue
- Jhumka bases (you can find these in craft stores or online)
- Jump rings
- Earring hooks
- Clear varnish or Mod Podge (optional, for sealing)
Steps:
1. Quilling:
- Choose the colors you want for your jhumkas.
- Take a quilling strip and insert one end into the quilling tool.
- Start rolling the paper strip around the tool. Keep the tension even for a neat coil.
- Once you’ve rolled the entire strip, carefully slide it off the tool.
- Allow the coil to relax a bit, then glue the end to secure it.
- You can shape the coil into various designs like teardrops, scrolls, or spirals by pinching and pulling the coil gently.
2. Assembling the Jhumkas:
- Take the jhumka base and apply glue on its surface.
- Carefully attach the quilled designs onto the base. You can layer different shapes and sizes for a more intricate look.
- Once you’re satisfied with the design, allow the glue to dry completely.
3. Finishing Touches:
- Apply a thin layer of clear varnish or Mod Podge over the quilled design to seal it and give it a glossy finish (optional).
- Once the varnish is dry, attach a jump ring to the top loop of the jhumka base.
- Slip an earring hook through the jump ring.
- Repeat the process for the second jhumka to complete the pair.
Tips:
- Experiment with different quilling techniques like tight coils, loose coils, or marquise shapes to create unique designs.
- Use contrasting colors or gradients to add depth and visual interest to your jhumkas.
- You can embellish your jhumkas further with beads, rhinestones, or glitter for extra sparkle.


Helpful post, Thank you. For more information about this subject and Classical Guitar you can find useful articles on https://mohammadtaherkhani.com . Have a good day.
Профессиональный сервисный центр по ремонту бытовой техники с выездом на дом.
Мы предлагаем:ремонт крупногабаритной техники в москве
Наши мастера оперативно устранят неисправности вашего устройства в сервисе или с выездом на дом!