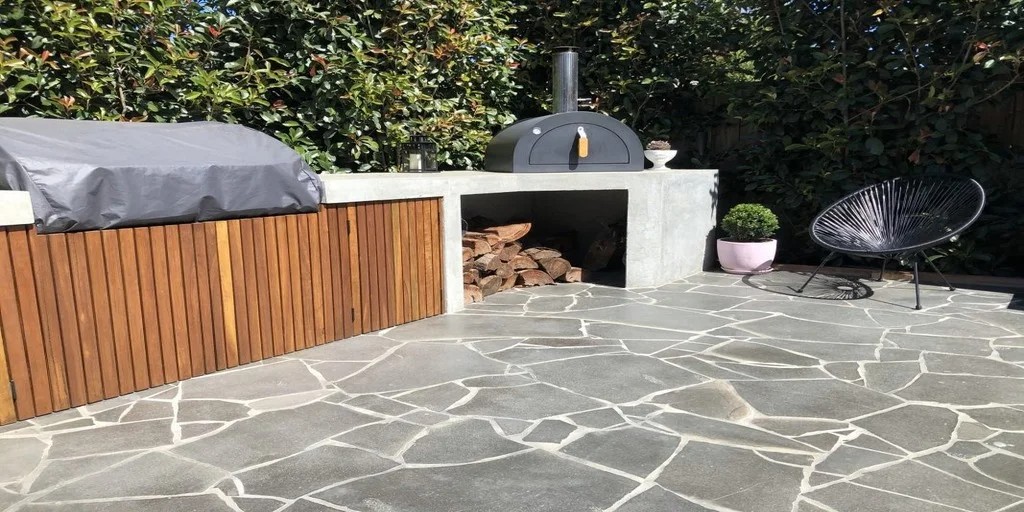
We are aware that you’re constantly searching for unusual, eye-catching and long-lasting materials for your house. One such design that will improve the appearance and feel of your area and give it a distinctive appearance is crazy paving.
Any area is made more beautiful by the addition of natural stones, and using them in your project turns it into a mesmerizing beauty retreat.
Using crazy stone pavers is a popular way to give outdoor areas and walls personality and texture. Its asymmetrical design and usage of real stones can produce a singular, eye-catching element. It is critical to realize that every stage is essential to laying the groundwork for a solid outcome overall.
This step-by-step tutorial will let you know how to build crazy paving on a wall. Additionally, you will discover how to get the ground ready for crazy paving.
How to Install Crazy Stone Pavers?
- Planning and Preparation
The first step is planning out the whole thing. It’s crucial to take your time while creating the intricate pavement pattern on your wall. These include the wall’s dimensions, the type of stones you plan to use to build it and even the final look you want to attain. Check for cracks or other flaws on the wall. If any is found, repair it before starting with the installation.
- Mixing Mortar or Cement
The next step is preparing the base. It is very important because the longevity of the crazy stone pavers also depends on this. So, once planning is done, mix the cement or mortar in the prescribed amount as directed by the manufacturer.
It shouldn’t be extremely thick or watery. But it should have a consistency that allows the stones to be fastened without shifting around too much. To prevent this during preparation, it is a good idea to mix amounts at a time so that the mixture may be moistened often.
- Applying Mortar on the Wall
Post mixing the mortar now is the time to apply it. We recommend applying a layer of mortar or cement first to the affected area of the wall using a trowel.
You will start by setting the stones in place. This helps prevent the mortar from stiffening up before use when working on smaller portions of the wall. As you work, check the consistency of the mortar; if it begins to dry out or harden, replace it with fresh mortar.
- Laying The Crazy Stone Pavers
Next is laying the stones. Since crazy paving entails placing stones at random, make sure that the stones you purchase come in a variety of sizes and shapes. To ensure that there is good contact between the stones and the mortar, squash each stone into the mixture until it adheres to the other.
- Fitting Crazy Stone Pavers Together
Make sure the stones are closely spaced from one another so that there are minimal spaces between them. If there are any very large stones, it is advisable to split them so they fit better.
It is okay if some of the crazy stone pavers are slightly smaller. While achieving a level surface should be the primary goal, minor deviations are common and contemporary crazy paving thrives on the latter.
- Leveling and Adjusting
Sometimes, use a spirit level to find out how high or low the stones are. Adjust a few of them by tapping the stones with a rubber mallet or adding extra mortar at the bottom to create a level surface.
- Grouting
Prepare the grout according to the package’s instructions once the stones have been set and the mortar has hardened, which should happen in 24 to 48 hours.
Work the grout float into the stones and press the grout into them as you uncover additional layers to make sure the stones are packed tightly. Use a moist sponge to remove any remaining grout from the stone surface as you work on a portion so that it doesn’t start to harden.
- Cleaning Up
To get rid of grout residue, the stones’ surface must be cleaned with a moist sponge after grouting. In the space between the crazy stone pavers and the grout lines, make every effort to avoid disturbing the grain. The grout should be given the recommended amount of time to cure, as specified by the manufacturer.
- Sealing (Optional)
After the grout has been set, avoid rinsing it with water to prevent water damage and stains. Apply a waterproofing sealant to the crazy stone paving’s exterior. Regarding application and drying, the specifics of usage must be in accordance with the manufacturer’s instructions.
Also Read: How to Clean Pool Tiles – Tips & Tricks
The Bottom Line
Using crazy stone pavers for your wall in an insane paving job guarantees a long-lasting makeover in addition to a fresh look. You may create a gorgeous feature that improves both indoor and outdoor areas by carefully following the instructions and paying close attention to detail.
The particular appeal of crazy paving, whether it’s used as an interior accent or as a garden wall, is guaranteed to change with time due to its uneven beauty. Savour the process of coming up with your timeless stone artwork and the enjoyment that comes with it. Cheers to many more years of admiring your stone-clad space’s elegance and artistry!


