
Jewelry photography is an art that requires precision, attention to detail, and the right techniques. Jewelry retouching services play a pivotal role in ensuring the final images appear flawless and professional. Even if your photography setup and techniques are top-notch, post-production editing can elevate your images by perfecting the background, enhancing details, and correcting imperfections. This guide will walk you through tips and techniques for photographing jewelry on a white background while emphasizing the importance of professional retouching.
Why Choose a White Background for Jewelry Photography?
A white background is a popular choice in jewelry photography for several reasons:
- Minimal distractions: It allows the jewelry to take center stage.
- Enhanced contrast: Reflective surfaces and gemstones stand out more against white.
- Professional aesthetic: White provides a clean, polished, and modern look.
- Versatility: Works well with metals like gold, silver, platinum, and gemstones such as diamonds.
However, while white backgrounds are ideal for most jewelry pieces, artisan or handmade jewelry may require textured or colored backgrounds to complement their unique designs.
Step-by-Step Guide to Photographing Jewelry on a White Background
Step 1: Organize Your Equipment
Gather the essential tools for jewelry photography:
- Camera: A DSLR or mirrorless camera with macro capabilities is ideal.
- Lens: Macro lenses ensure detailed and close-up shots.
- Tripod: Keeps the camera steady, especially for long exposure shots.
- White Background Materials: Seamless paper, white foam board, or PVC backdrops.
- Lighting Equipment: Includes softboxes, diffusers, and reflectors.
- Remote Shutter Release: Minimizes camera shakes for sharper images.
Step 2: Set Up the White Backdrop
To create a seamless look:
- Use white paper rolls, fabric, or foam boards.
- Secure the backdrop with clamps or tape to eliminate wrinkles.
- Position the backdrop so it covers the entire photography area.
Pro Tip: Ensure the backdrop is evenly lit to avoid shadows or discoloration in the final image.
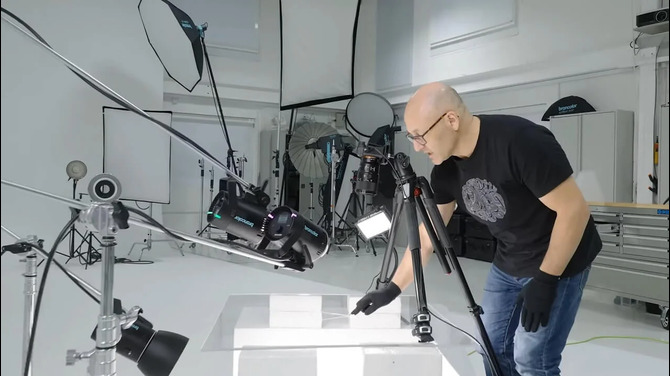
Step 3: Perfect Your Lighting Setup
Lighting is critical in jewelry photography. Use a combination of:
- Primary Light: The main light source, such as natural sunlight or soft artificial light. Position it in front of the jewelry for even illumination.
- Filler Lights: Place on both sides of the jewelry to minimize shadows and add depth.
- Background Illuminators: Brighten the white backdrop to ensure it appears clean and even.
To soften the light and avoid harsh reflections, use softboxes, light tents, or diffusers.
Step 4: Adjust Camera Settings
Set up your camera for optimal results:
- Aperture: Use f/14 for sharp focus and clarity.
- ISO: Keep it low (100–200) for noise-free images.
- White Balance: Auto mode works well for most lighting conditions.
- Shutter Speed: Leave it on auto if shooting in well-lit conditions.
Always mount your camera on a tripod for stability and use a macro lens to capture intricate details.
Step 5: Capture the Perfect Shot
Before taking photos:
- Clean the jewelry to remove fingerprints, dust, or smudges.
- Position props sparingly to enhance, not overshadow, the jewelry.
- Use a remote shutter release to avoid vibrations.
Take multiple shots from various angles to capture the jewelry’s sparkle and brilliance.
The Role of Jewelry Retouching in Post-Production
No matter how skilled you are, capturing a perfect image straight from the camera is rare. This is where jewelry retouching services become essential. Post-production editing ensures:
- The white background is flawless and distraction-free.
- Colors, shine, and details of the jewelry are enhanced.
- Shadows and reflections are corrected to maintain realism.
- Blemishes, dust, and scratches on the jewelry are removed.
Tools like Adobe Photoshop can help achieve a polished look, but professional retouching services save time and deliver industry-standard results.
Frequently Asked Questions
- What is the best background for jewelry photography?
White is the most versatile background for jewelry photography. It highlights details, enhances contrast, and creates a clean, professional appearance. - Can black backgrounds work for jewelry photography?
Black backgrounds can create a luxurious feel but may not work for all jewelry types. They also pose challenges in highlighting dust, scratches, and imperfections. - What camera settings are ideal for jewelry photography?
- Aperture: f/14 for detailed focus.
- ISO: 100–200 for high-quality, noise-free images.
- Shutter Speed: Auto in well-lit setups.
- Is professional editing necessary for jewelry photography?
Yes, editing ensures the final image looks polished and professional. Backgrounds can be refined, and the jewelry’s details can be enhanced for an eye-catching result.
Conclusion
Photographing jewelry on a white background requires careful planning, the right equipment, and proper lighting techniques. However, the journey doesn’t end after the photoshoot. Jewelry retouching services are indispensable in creating flawless and captivating images that appeal to buyers. By combining the tips in this guide with professional editing, you can elevate your jewelry photography to the next level. Give us a free trial to show our skill.


