A smoothly running dishwasher is essential for maintaining a clean and efficient kitchen, and at the heart of this performance lies the dishwasher sump assembly. This vital component is responsible for managing water flow, filtering debris, and supporting the pump to deliver spotless results. However, when the dishwasher sump assembly starts to deteriorate, it can compromise cleaning efficiency and even risk water damage. Recognizing the early warning signs of failure is key to avoiding costly repairs and ensuring your appliance continues to operate at peak performance.
Warning Signs of a Sump Assembly That May Be Failing
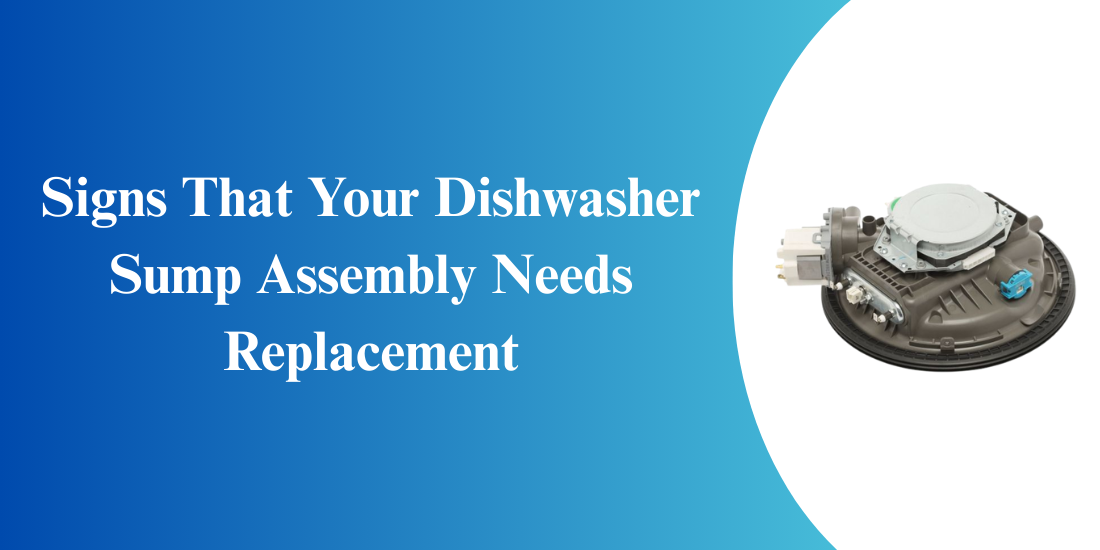
The sump assembly manages water flow and drainage during dishwasher operation. Gradual performance issues often signal failure, making early identification essential for avoiding operational disruptions and ensuring timely repair or replacement.
Below are key indicators that your dishwasher sump assembly may be showing signs of failure:
Standing Water After the Cycle
If you consistently find water pooling in the bottom of the tub after a wash cycle, the sump assembly may not be draining correctly. A damaged or clogged drain pump inside the assembly is a common cause.
Unusual or Loud Noises During Operation
A healthy dishwasher typically runs quietly. If you begin to notice loud humming, grinding, or rattling sounds, it may point to worn bearings, impeller damage, or a failing circulation motor housed within the sump assembly.
Inconsistent Water Pressure or Spray Arm Performance
Reduced cleaning efficiency or partially cleaned dishes can occur when the sump’s internal pump can no longer generate sufficient water pressure. This leads to weak spray arm rotation and incomplete rinsing.
Recurring Error Codes or Cycle Interruptions
Many dishwashers display fault codes when internal diagnostics detect irregularities. Codes related to drainage failure, circulation errors, or pump speed issues may be traced back to problems inside the sump assembly.
Leaking Under or Around the Dishwasher
Cracks in the sump housing or worn gaskets can allow water to escape during cycles. Pooled water near the base of the unit or signs of moisture damage underneath the dishwasher are common indicators.
Odors or Persistent Debris
If you notice a musty smell or leftover food particles after cleaning, it could indicate that the filtration system within the sump is obstructed or damaged, preventing proper water recirculation and drainage.
Delayed or Extended Wash Cycles
When the sump pump struggles to maintain pressure or complete drainage efficiently, the system may compensate by extending cycles. If your dishwasher suddenly takes significantly longer than usual, internal wear in the sump assembly may be contributing.
When a Reset Isn’t Enough: Why Replacement Is Often Necessary
Resetting the dishwasher may temporarily clear minor issues, but persistent problems often point to deeper concerns with the dishwasher sump assembly. Understanding when a reset falls short helps ensure lasting performance and prevents recurring malfunctions.
Key reasons why replacement becomes necessary include:
Recurring Drainage Issues
If water remains pooled at the bottom even after performing a reset, the dishwasher sump assembly may have internal blockages or mechanical wear that cannot be corrected without replacement.
Unusual Noises During Operation
Grinding, rattling, or humming sounds often suggest motor or impeller problems within the sump assembly. These mechanical faults rarely improve with resets and usually demand replacement.
Visible Wear or Damage
Cracks, leaks, or deterioration in the housing are clear indicators that the sump assembly’s integrity is compromised. In such cases, replacement is the only effective solution.
Persistent Error Codes
Some dishwashers display recurring error codes tied to circulation or drainage failures. If these return after a reset, it suggests that the sump assembly is no longer functioning as intended.
Inconsistent Cleaning Results
When dishes remain dirty or soap residue is left behind despite multiple resets, the sump assembly’s ability to circulate water effectively is diminished, and replacement is needed.
Tools You’ll Need to Replace a Dishwasher Sump Assembly
Replacing a dishwasher sump assembly requires proper preparation to ensure the process is smooth and efficient, especially in commercial settings where downtime can affect operations. Having the right tools at hand not only speeds up the replacement but also reduces the risk of damaging delicate components.
Below is a detailed list of essential tools every technician should have before starting the task:
- Screwdrivers: A set of flathead and Phillips screwdrivers is necessary to remove panels, screws, and clips holding the sump assembly in place.
- Adjustable Wrench: Useful for loosening and tightening nuts and bolts connecting the sump assembly to water lines or mounting brackets.
- Pliers: Needle-nose and standard pliers help in gripping small parts, disconnecting hoses, and handling clamps.
- Socket Set: Various socket sizes allow access to hard-to-reach bolts that secure the sump assembly within the dishwasher unit.
- Bucket or Tray: Essential for catching residual water from the dishwasher to prevent spills and maintain a clean workspace.
- Cleaning Cloths: Handy for wiping away water or debris and keeping components dry before reassembly.
- Flashlight or Headlamp: Provides clear visibility inside the dishwasher’s tight compartments, making it easier to identify connections and alignment points.
- Replacement Gaskets and Seals: While not a tool, having these on hand ensures a secure, leak-free fit when installing the new sump assembly.
Replacement Procedure for the Dishwasher Sump Assembly
The dishwasher sump assembly is central to water circulation and drainage. When it fails, a reset is often insufficient, making replacement the most reliable solution.
Below is a step-by-step outline of how to carefully perform this procedure.
Preparation Before Replacement
- Disconnect Power and Water: Unplug the dishwasher and shut off its water supply. This prevents safety hazards and ensures a controlled workspace.
- Gather Tools and Parts: Required tools include screwdrivers, pliers, towels, and the correct replacement dishwasher sump assembly. Having these ready avoids unnecessary interruptions.
- Create a Clear Work Area: Move the dishwasher slightly forward and ensure you have easy access to both the interior and underside of the appliance.
Accessing Internal Components
- Remove Lower Dish Rack: Slide out the bottom rack for better visibility and workspace inside the tub.
- Detach Spray Arms and Filters: Unscrew the lower spray arm and remove the filter system. These steps expose the sump housing.
- Loosen Housing Covers: Take off protective covers that shield the sump assembly to access it fully.
Detaching the Old Assembly
- Disconnect Wiring and Hoses: Carefully detach electrical connectors and water hoses, noting their original positions for accurate reinstallation.
- Remove Fasteners or Clips: Unscrew or release the locking components holding the sump assembly in place.
- Lift Out the Assembly: Gently remove the old dishwasher sump assembly, keeping a towel nearby to absorb any residual water.
Installing the Replacement Unit
- Position the New Assembly: Fit the new dishwasher sump assembly securely into its housing, aligning it with original placements.
- Reconnect Wires and Hoses: Attach connectors and hoses firmly to prevent leaks or loose electrical contacts.
- Reinstall Covers, Filters, and Spray Arms: Replace all protective components and restore the lower rack to its original position.
Testing and Final Confirmation
- Reconnect Power and Water Supply: Restore utilities and power on the dishwasher.
- Run a Short Test Cycle: Check for proper water circulation, spray action, and drainage.
- Inspect for Leaks: Closely monitor the unit during its cycle to ensure fittings are watertight and performance is stable.
Preventive Maintenance to Extend Sump Assembly Longevity
Consistent care helps prolong the efficiency and durability of the dishwasher sump assembly. By integrating simple maintenance steps into routine cleaning, you can reduce premature wear and keep the unit functioning at its best.
Key Preventive Practices:
Rinse Dishes Before Loading
Scrape off large food particles to prevent debris from clogging the dishwasher sump assembly and straining the pump.
Clean Filters Regularly
Remove and wash filters under running water to ensure smooth water flow and prevent buildup that can stress the sump assembly.
Inspect Spray Arms
Check for food or mineral deposits in spray arm holes. Blockages reduce water pressure and may cause unnecessary strain on the sump system.
Check for Leaks or Moisture
Periodically inspect around the dishwasher base for signs of water leaks that could damage seals connected to the sump assembly.
Run Cleaning Cycles
Use dishwasher-safe cleaners or vinegar cycles monthly to minimize grease, detergent film, and scale accumulation.
Schedule Seasonal Inspections
Examine internal components to confirm the sump assembly remains secure, free of cracks, and properly connected.
Maintaining and addressing issues with the dishwasher sump assembly is essential for reliable cleaning performance and long-term efficiency. Recognizing early warning signs, conducting timely inspections, and applying preventive practices can significantly reduce unexpected disruptions. While resets may resolve minor concerns, replacement is often the definitive solution when failures persist. By combining proactive care with proper repair or replacement, you ensure the dishwasher continues to perform effectively, supporting consistent results and minimizing unnecessary strain on its internal components.
HnK Parts offers stove and oven parts, dishwasher components, and refrigeration parts with fast shipping to keep your home appliances working smoothly.
Frequently Asked Questions (FAQ’s)
1. Is it worth replacing a dishwasher drain pump?
Yes, replacing a dishwasher drain pump is worthwhile if the appliance is in good condition and repair costs remain economical.
2. How to test a dishwasher sump?
To test a dishwasher sump, inspect for leaks, ensure proper water flow, check for noise, and verify drainage during a cycle.
3. What is the most common failure on a dishwasher?
The most common dishwasher failure involves the sump assembly, often causing drainage issues, leaks, or reduced water circulation during cycles.
4. Can I replace a sump pump myself?
Yes, you can replace a sump pump yourself if you follow safety precautions, use proper tools, and carefully follow installation steps.