
Growing pea plants can be a rewarding experience. These resilient legumes are not only easy to cultivate but also enrich the soil with nitrogen, making them an excellent addition to any garden. This comprehensive guide will walk you through the best practices for watering and fertilizing your pea plants, ensuring they thrive and produce a bountiful harvest.
Understanding Pea Plants
Before diving into the specifics of watering and fertilizing, it’s essential to understand the nature of pea plants. Peas (Pisum sativum) are cool-season crops that prefer mild temperatures. They can be grown in spring and fall, producing sweet, nutritious pods that can be enjoyed fresh or cooked.
Types of Pea Plants
Pea plants come in various types, each with its unique growth habits and requirements:
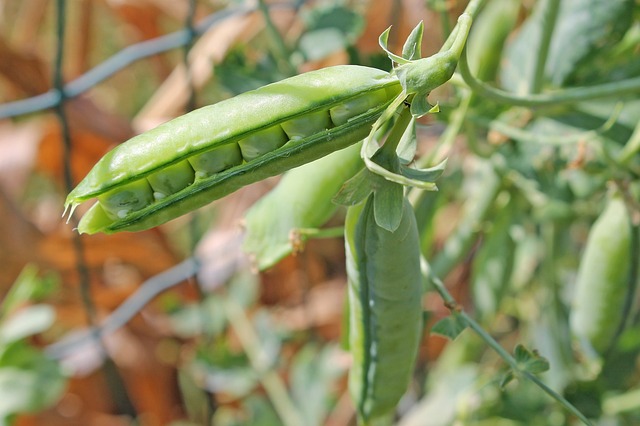
- Garden Peas (English Peas): These are shelled peas where only the seeds are consumed.
- Snow Peas: These have flat, edible pods and are often used in stir-fries.
- Sugar Snap Peas: These have plump, edible pods and are sweet and crunchy.
Knowing the type of pea plant you are growing helps tailor your watering and fertilizing practices to meet their specific needs.
Preparing the Soil
The foundation of healthy pea plants starts with good soil preparation. Peas prefer well-drained, loamy soil rich in organic matter. Preparing the soil properly ensures your plants have the nutrients they need from the start.
Soil Testing
Before planting, conduct a soil test to determine its pH and nutrient levels. Pea plants thrive in soil with a pH between 6.0 and 7.5. Adjusting the pH, if necessary, can be done by adding lime to raise it or sulfur to lower it.
Adding Organic Matter
Incorporate plenty of organic matter, such as compost or well-rotted manure, into the soil. This not only improves soil structure but also provides a slow-release source of nutrients.
Planting Pea Seeds
Timing and technique are crucial when planting pea seeds. Follow these steps for optimal results:
Choosing the Right Time
Plant pea seeds as soon as the soil can be worked in the spring. Pea seeds germinate best in soil temperatures between 40°F and 85°F. Planting early helps the plants establish before the warmer weather arrives.
Planting Depth and Spacing
Plant seeds about 1 to 2 inches deep and 2 inches apart. If planting in rows, space the rows about 18 to 24 inches apart. This spacing allows for adequate air circulation, reducing the risk of fungal diseases.
Watering Pea Plants
Watering is a critical aspect of pea plant care. Proper watering practices ensure your plants grow vigorously and produce a high yield.
Initial Watering
After planting the seeds, water the soil thoroughly. This initial watering helps settle the soil around the seeds and kick-starts the germination process.
Consistent Moisture
Pea plants need consistent moisture, especially during flowering and pod development. Aim to keep the soil evenly moist but not waterlogged. Overwatering can lead to root rot and other fungal issues.
Deep Watering Technique
Water deeply once or twice a week rather than frequent shallow watering. Deep watering encourages the roots to grow deeper, making the plants more drought-resistant.
Mulching
Mulching around your pea plants helps retain soil moisture, suppress weeds, and regulate soil temperature. Use organic mulches like straw or compost to add additional nutrients to the soil as they decompose.
Fertilizing Pea Plants
Fertilizing pea plants properly is key to promoting healthy growth and maximizing yields. Since peas are legumes, they have a unique relationship with nitrogen, which influences how they should be fertilized.
Understanding Nitrogen Fixation
Pea plants have a symbiotic relationship with Rhizobium bacteria, which form nodules on the roots and fix atmospheric nitrogen into a form the plants can use. This natural process reduces the need for nitrogen fertilizers.
Pre-Planting Fertilization
Before planting, apply a balanced fertilizer, such as a 10-10-10 formula, to provide essential nutrients. Work the fertilizer into the top few inches of soil. Avoid excessive nitrogen, as it can promote leafy growth at the expense of pod production.
Side-Dressing During Growth
Once the plants are established and starting to flower, side-dress them with a low-nitrogen fertilizer. Use a fertilizer with higher phosphorus and potassium levels, such as a 5-10-10 blend, to support flowering and pod development.
Organic Fertilizer Options
Organic fertilizers, such as compost, well-rotted manure, and fish emulsion, are excellent choices for pea plants. They provide a slow-release source of nutrients and improve soil health over time.
Troubleshooting Common Issues
Even with the best care, pea plants can encounter problems. Identifying and addressing these issues promptly ensures your plants stay healthy.
Yellowing Leaves
Yellowing leaves can indicate several issues, including nitrogen deficiency, overwatering, or pests. Conduct a soil test to check nutrient levels and adjust watering practices as needed.
Poor Flowering or Pod Set
If your pea plants are not flowering or setting pods, they may be experiencing heat stress, poor pollination, or nutrient imbalances. Ensure they have adequate water and are not exposed to high temperatures.
Pests and Diseases
Pea plants can be affected by pests such as aphids and diseases like powdery mildew. Regularly inspect your plants and take action at the first sign of trouble. Use organic pest control methods, such as neem oil or insecticidal soap, to manage infestations.
Harvesting Pea Plants
Harvesting at the right time ensures you get the best flavor and texture from your peas. Here’s how to do it:
Garden Peas
Harvest garden peas when the pods are plump, and the seeds are round and firm. Avoid letting them become overly mature, as they can become starchy.
Snow Peas
Snow peas should be harvested when the pods are flat and before the seeds start to swell. They are best picked young for the sweetest taste.
Sugar Snap Peas
Pick sugar snap peas when the pods are full and the peas inside are still tender. They should snap easily when bent.
Post-Harvest Care
Proper post-harvest care ensures your peas stay fresh and flavorful.
Storing Fresh Peas
Fresh peas can be stored in the refrigerator for up to a week. Keep them in a plastic bag or container to maintain humidity and prevent them from drying out.
Freezing Peas
For long-term storage, blanch peas in boiling water for 1 to 2 minutes, then plunge them into ice water. Drain and pack them into freezer bags. Frozen peas retain their flavor and nutritional value for several months.
Enhancing Soil for Future Crops
Pea plants leave the soil enriched with nitrogen, benefiting future crops. Here’s how to make the most of this natural advantage:
Crop Rotation
Rotate your pea plants with heavy feeders like tomatoes, corn, or squash. These crops will benefit from the nitrogen left behind by the peas.
Cover Cropping
Plant a cover crop, such as clover or vetch, after harvesting your peas. Cover crops improve soil structure, add organic matter, and fix additional nitrogen.
Conclusion
Watering and fertilizing pea plants effectively can lead to a thriving garden and a generous harvest. By understanding their specific needs and following these best practices, you can enjoy the process of growing these delightful legumes. With proper care, your pea plants will reward you with sweet, nutritious pods that are a joy to eat.
Growing peas is not only beneficial for your garden but also a fulfilling and enjoyable endeavor. So, roll up your sleeves, get your hands dirty, and watch your pea plants flourish.
Read More


Nice Article