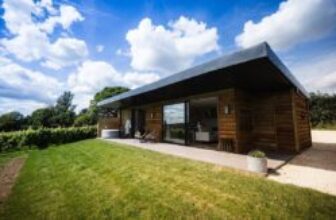
Every musician dreams of having a personal space where creativity flows freely — a home music studio. But for many, the process of building such a studio can feel overwhelming. From understanding how to create a studio to selecting the right microphone studio setup, it takes careful planning and knowledge to get it right.
Whether you’re a budding music artist or a seasoned producer, creating the perfect recording space doesn’t have to be complicated. With this guide, we’ll break down the process into manageable steps to help you achieve a professional setup at home. And if you ever find yourself experimenting with audio clips, you can even upload a song to find the name of tracks that inspire you. Let’s dive in.
1. Choose the Right Space
The first step in building your home music studio is selecting the ideal location. The space should offer:
- Minimal external noise
- Adequate room size
- Flexibility for acoustic treatment
For instance, a spare bedroom or basement works well. Avoid high-traffic areas and opt for a room with a symmetrical shape for better sound distribution. Explore detailed tips on how to create a studio for more insights into space selection and setup.
2. Invest in Quality Equipment
To achieve high-quality sound, you need the right tools. Here’s a quick checklist of essentials:
Microphones:
- Investing in the best mics to record vocals ensures clear and precise recordings. Large diaphragm condenser mics are ideal for vocals, while dynamic microphones work well for instruments.
Audio Interface:
- This acts as the bridge between your computer and your recording gear.
Studio Monitors and Headphones:
- Monitors provide accurate playback, while headphones help you detect finer details in your recordings.
For an optimized microphone studio setup, don’t forget to consider accessories like shock mounts, pop filters, and adjustable stands.
3. Acoustic Treatment is Key
Even the best equipment can’t compensate for poor acoustics. Treating your room with acoustic panels, diffusers, and bass traps minimizes echoes and improves sound clarity.
- Position bass traps in corners to absorb low frequencies.
- Use acoustic panels to reduce mid to high-frequency reflections.
- Install a thick rug to dampen floor reflections.
Acoustic treatment doesn’t have to be expensive — many DIY options are available to get you started.
4. Optimize Your Workflow
A cluttered studio hampers creativity. Organize your workspace by:
- Mounting monitors on adjustable stands.
- Using cable organizers to prevent tangling.
- Labeling inputs and outputs for quick access.
Additionally, software integration is crucial. Tools like DAWs (Digital Audio Workstations) streamline your workflow, making it easier to record, edit, and produce music efficiently.
5. Test and Refine Your Setup
Before diving into full-fledged recording, test your studio thoroughly. Here are a few tips:
- Record a few test vocals and evaluate their clarity.
- Play back your recordings on different devices to assess quality.
- For added fun, upload a song to find the name of tracks you love and see how they compare sonically to your recordings.
Testing ensures your studio is fine-tuned to deliver professional-grade results.
Conclusion
Building a home music studio may seem daunting, but breaking it into simple steps makes the process manageable. From selecting the right space and refining your microphone studio setup to investing in the best mics to record vocals, each decision brings you closer to your dream setup.
Whether you’re a novice experimenting with tracks or an established music artist creating your next masterpiece, a home studio gives you the freedom to produce music on your terms. Don’t forget to upload a song to find the name if inspiration strikes during your setup journey.
Take the first step today by exploring more tips and resources on how to create a studio, and start making music that resonates with the world.


